Windows Server - Certbot Let's Encrypt 무료 인증서 발급, 자동갱신, 자동설치 구축
Certbot을 이용한 무료 인증서 (Let's Encrypt) 발급, 자동갱신, 자동 설치 방법에 대한 매뉴얼이며 Windows Server 기반으로 작성되었다. Certbot은 Let's Encrypt 인증서를 자동으로 발급, 갱신 및 관리하기 위한 도구이다. Let's Encrypt는 무료로 SSL/TLS 인증서를 제공하는 자동화된 인증 기관이다. Certbot은 커맨드 라인 인터페이스를 통해 사용되며, 다양한 웹 서버 및 운영 체제와 호환된다.
[목차]
1. Certbot 설치
- 공식사이트 : https://certbot.eff.org/
Certbot
Tagline
certbot.eff.org
- 설치파일 : 윈도우용 설치 파일 다운로드
Certbot Instructions
Tagline
certbot.eff.org
- 설치과정
exe 파일을 받아서 install을 진행하면 된다.

- 설치 확인
Certbot 은 powershell이나 cmd로 실행하면 된다. help 커맨드를 입력해 확인해 볼 수 있다.
certbot -help
2. Certbot 사용 방법
옵션이 상당히 많은데 자세한 내용은 아래 페이지에서 확인가능하다
https://eff-certbot.readthedocs.io/en/stable/
Welcome to the Certbot documentation! — Certbot 2.6.0 documentation
© Copyright 2014-2018 - The Certbot software and documentation are licensed under the Apache 2.0 license as described at https://eff.org/cb-license. Let's Encrypt Status Revision 013621d0.
eff-certbot.readthedocs.io
- 인증서 발급 방법
- 예제 옵션의 의미 :
- --manual : 수동으로 인증서를 발급한다는 의미
- --preferred-challenges dns : DNS 도메인 인증 방식을 선택한다는 의미
- -d : 발급 대상 도메인
- 예제 옵션의 의미 :
certbot certonly --manual --preferred-challenges dns -d iis.gbminnote.com발급 과정 중 대화형 메시지 가 나오는데 DNS TXT 레코드 설정 하여 인증을 하고, 사용 동의, 뉴스레터 메일주소 등록등을 요구한다. 입력 후 진행 한다. DNS 인증설정 확인은 은 표기된 대로 입력하고 nslookup, dig 등을 이용해 입력이 확인 인을 하고 진행한다.
- DNS 체크 방법
[root@rocky9 ~]# dig _acme-challenge.iis.gbminnote.com TXT +short
"OiyIjLIuinrB2GT33g_gQr3Tj8K2_-l_SU11ZYPfxC0"- DNS 등록 후 발급화면

- 발급된 인증서는 C:\Certbot\archive\도메인명\ 경로에 저장된다.
PS C:\Users\Administrator> ls C:\Certbot\archive\iis.gbminnote.com


    디렉터리: C:\Certbot\archive\iis.gbminnote.com


Mode                LastWriteTime         Length Name
----                -------------         ------ ----
-a----     2023-05-18  오후 10:17           1574 cert1.pem
-a----     2023-05-18  오후 10:17           3749 chain1.pem
-a----     2023-05-18  오후 10:17           5323 fullchain1.pem
-a----     2023-05-18  오후 10:17            241 privkey1.pem
인증서와 체인 인증서와 개인키 모두 pem 형식으로 발급되고 certbot으로는 윈도우 설치 포맷인 pfx 형식으로 발급이 되지 않는다. crt 파일로 변경하여 인증서 정보를 체크해 볼 수 있다.

- 인증서 갱신
certbot의 간단한 커맨드 하나로 인증서 갱신이 되며 만료 30일 이하일 경우 갱신이 가능하다.
certbot renew- 인증서 변환
Windows OS에 인증서를 설치하려면 인증서 파일을 PKCS#12(.pfx) 형식으로 변환해야 한다. 윈도우에서 기본적으로 openssl 사용이 안되기 때문에 별도로 설치해야 사용해야 한다. 사용 방법과 pfx 파일의 변환 방법에 대한 자세한 내용은 이전에 작성한 글을 참고해 볼 수 있다.
PS C:\Users\Administrator> cd C:\Certbot\archive\iis.gbminnote.com
PS C:\Certbot\archive\iis.gbminnote.com> openssl pkcs12 -export -out D:\ssl\iis.gbminnote.com.pfx -inkey privkey1.pem -i
n cert1.pem -in fullchain1.pem
Enter Export Password:
Verifying - Enter Export Password:
cygwin - Windows 에서 Linux 느낌을 받으세요! Linux 개발 환경
Get that Linux feeling - on Windows 공식사이트에 있는 문구이다. cgwin은 Microsoft Windows에서 POSIX (유닉스 및 리눅스와 유사한) 호환성을 제공하는 오픈 소스 소프트웨어 패키지다. 윈도우에서 유닉스 및
gbminnote.com
[Linux command] openSSL 명령어 사용법
openssl 명령어 자주 사용되는 예제 정리 SSL 인증서 형식 변환, key. csr 생성, SSL 모듈 체크 방법 등 자주 사용 하는 openssl 명령어와 예제를 정리하였다. 1. key 생성 (RSA 알고리즘을 사용하여 2048bit 개
gbminnote.com
3. 인증서 자동 갱신
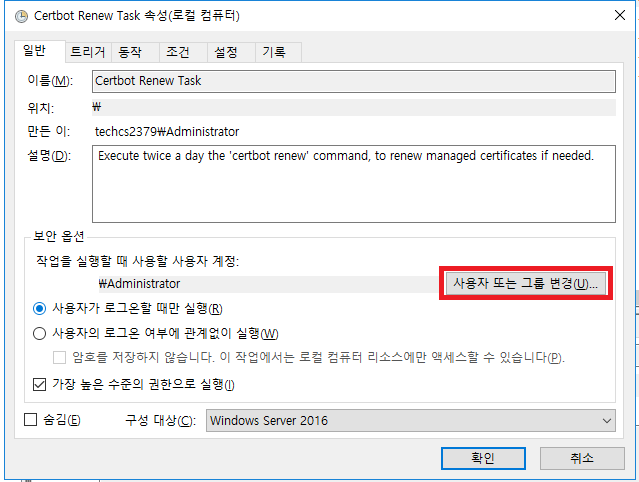
윈도우 버전의 certbot 은 설치 시 스케쥴러에 자동 갱신 스케줄러가 등록되기 때문에 설정내용을 확인 후 원하는 관리 방식으로 변경해서 실행해 주면 된다.


스케줄러가 정상동작 안 한다면 작업 계정 설정을 재설정해주면 된다.
4. SSL 자동설치
- 작업 프로세스 설계 및 구현
certbot 은 pem 형식으로 발급되기 때문에 윈도우에서 자동 설치를 구현하려면 별도의 작업을 필요로 한다. 구현프로세스 : 인증서 자동갱신 → PKCS#12 (.pfx 변환) → IIS설치 자동 갱신은 certbot → pfx 변환 후 IIS에 설치 및 바인딩 은 powershell 스크립트로 처리했다.
# Step 1 : 인증서 md5sum 체크 및 기록
$certPath = "C:\Certbot\archive\iis.gbminnote.com\cert1.pem"
$md5sumFile = "C:\Certbot\archive\iis.gbminnote.com\cert1_md5.txt"

$md5sum = Get-FileHash -Path $certPath -Algorithm MD5 | Select-Object -ExpandProperty Hash
$previousMd5sum = $null

if (Test-Path $md5sumFile) {
    $previousMd5sum = Get-Content $md5sumFile
}

if ($md5sum -eq $previousMd5sum) {
    Write-Host "md5sum 값이 일치합니다. 프로그램을 종료합니다."
    Exit
}

$md5sum | Set-Content $md5sumFile

# Step 2 : pfx 파일 변환
$pfxPath = "D:\ssl\iis.gbminnote.com.pfx"
$privkeyPath = "C:\Certbot\archive\iis.gbminnote.com\privkey1.pem"
$certPath = "C:\Certbot\archive\iis.gbminnote.com\cert1.pem"
$fullchainPath = "C:\Certbot\archive\iis.gbminnote.com\fullchain1.pem"
$websiteName = "gbminnote"
$domain = "iis.gbminnote.com"
$port = "443"
$certStoreLocation = "Cert:\LocalMachine\My"

$opensslCommand = "openssl pkcs12 -export -out '$pfxPath' -inkey '$privkeyPath' -in '$certPath' -in '$fullchainPath' -passout pass:`""""

try {
    Invoke-Expression -Command $opensslCommand
    Write-Host "pfx 파일이 성공적으로 생성되었습니다. 경로: $pfxPath"
} catch {
    Write-Host "pfx 파일 생성에 실패했습니다."
}

# Step 3 : 인증서 설치 및 바인딩
$certificate = Import-PfxCertificate -FilePath $pfxPath -CertStoreLocation $certStoreLocation -Exportable

$bindingInformation = "*:443:$domain"
$binding = Get-WebBinding -Name $websiteName | Where-Object { $_.bindingInformation -eq $bindingInformation }

if ($binding) {
    Write-Output "SSL binding already exists for $domain"
} else {
    Remove-WebBinding -Name $websiteName -Port $port -Protocol "https"
    $port = 443  # 포트 번호 설정
    $binding = New-WebBinding -Name $websiteName -Protocol "https" -Port $port -HostHeader $domain
}

if ($binding) {
    $certificateThumbprint = $certificate.Thumbprint
    $binding.AddSslCertificate($certificateThumbprint, "My")
    $binding | Set-WebBinding -Name $websiteName -PropertyName "SslFlags" -Value 1
    $binding | Set-WebBinding -Name $websiteName -PropertyName "SslCertificateThumbprint" -Value $certificateThumbprint
    Write-Output "SSL binding created for $domain"

    # 인증서 선택
    $selectedCert = "Cert:\LocalMachine\My\$certificateThumbprint"
    $certUtilCommand = "CertUtil -store -user My $certificateThumbprint"

    Write-Output "인증서가 선택되었습니다."
} else {
    Write-Output "Failed to create SSL binding for $domain"
}
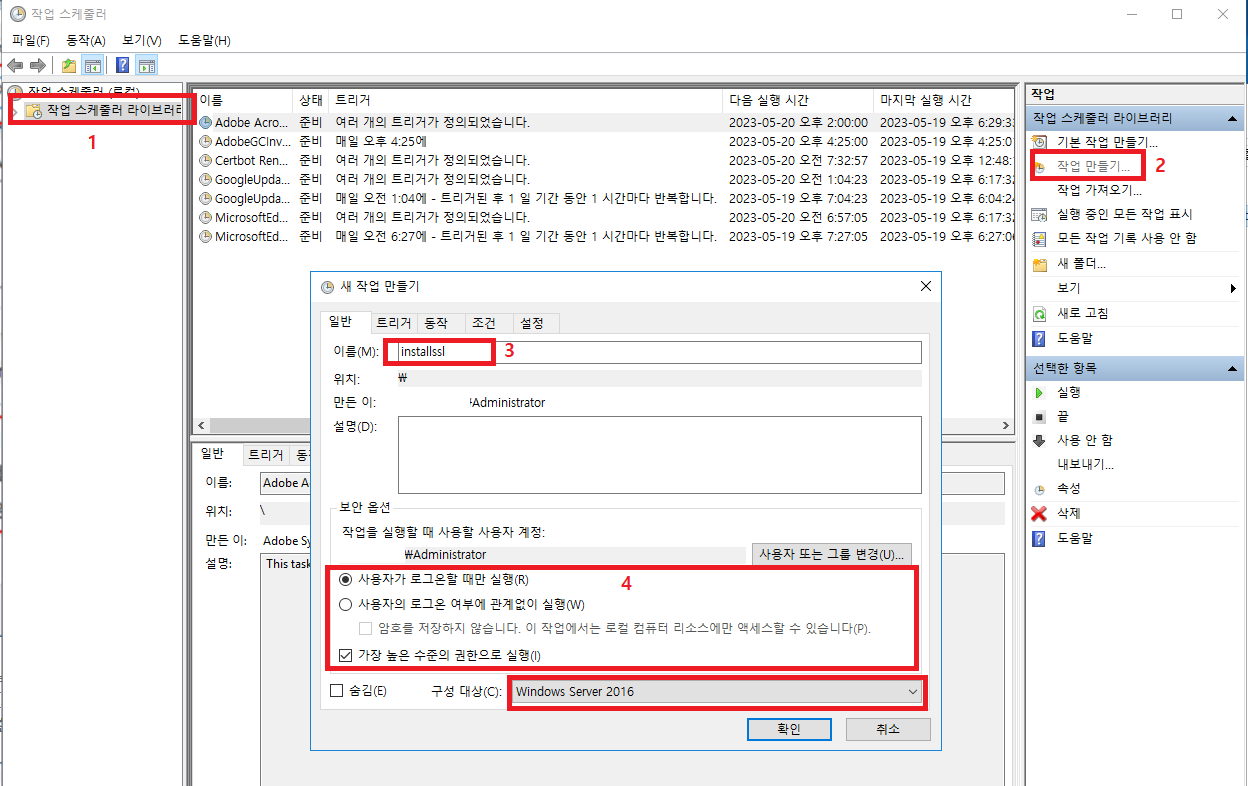
- 스케쥴러 등록
새 작업 만들기
트리거탭

동작 속성 설정
스크립트 : C:\Windows\System32\WindowsPowerShell\v1.0\powershell.exe
인수추가 : -ExecutionPolicy Unrestricted -File ""C:\workingscript\installssl.ps1"

등록된 스케줄러를 수동으로 실행해서 동작 확인.

이와 같은 방법으로 윈도우 서버에서 Certbot 을 이용해 Let's Encrypt 무료 인증서 발급 부터 갱신, 자동 설치 까지 할수 있는 시스템을 구축할수 있다 시스템 환경에 따라 처리 방법은 다를수 있으니 기본 프로세스는 이글의 내용다 크게 달라지지 않는다.